In today’s digital age, music enthusiasts have the world of music at their fingertips, thanks to platforms like Audiomack. Audiomack allows users to discover and download their favorite tracks, but one common challenge is how to transfer downloaded music from Audiomack to their phone’s internal storage.
In this comprehensive guide, we’ll show you step-by-step how to accomplish this task seamlessly. But first and foremost, why does people transfer music to their Phone’s Internal Storage from Audiomack?
Before diving into the process, it’s essential to understand why you might want to transfer your downloaded songs to your phone’s internal storage. There are several compelling reasons:
1. Offline Access: Storing music on your device’s internal storage ensures you can enjoy your favorite tunes even when you’re offline, such as during flights or in areas with limited connectivity.
2. Customization of Music Library: Organizing your music on your device allows for greater customization. You can create playlists, categorize songs, and easily access the music you love.
3. Storage Management: Transferring music to your internal storage helps you keep track of your storage usage, ensuring you have ample space for other apps and files.
Now, let’s dive into the step-by-step process of transferring downloaded music from Audiomack to your phone’s internal storage.
Steps of Transferring Downloaded Music from Audiomack to your Phone Internal Storage
Step 1: Download Solid Explorer File Manager App
To begin, you’ll need to download the Solid Explorer File Manager app from the Play Store. This app will serve as a bridge between your Audiomack downloads and your phone’s internal storage.
Step 2: Move Downloaded Music within Audiomack
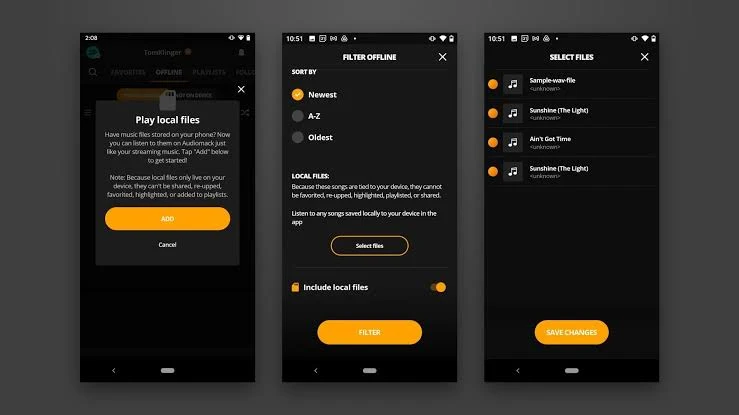
- Launch your Audiomack app.
- Tap on the “My Library.”
- Next, tap on “Offline.”
- Use the settings icon to sort by “Newest.”
Step 3: Access and Rename Downloaded Music Files
- Launch the Solid Explorer File Manager App.
- Allow all necessary permissions for the File Manager.
- Go-to to “Android” > “Data.”
- Find and open the folder named “com.audiomack.”
- Inside this folder, locate “files” and then “Audiomack.”
- You’ll find files with 8-digit numbers; these are your downloaded music files.
- Copy each file one at a time and move them to another folder on your device.
- Rename each file with the name of the song as it appears, starting with the newest. For example, change “15373857” to “Wizkid_Joro.mp3.”
Step 4: Play Your MP3 Files
Finally, you can play your renamed MP3 files with any music player of your choice, seamlessly enjoying your Audiomack downloads.
FAQs
How can I transfer music from Audiomack to SD Card?
A solid explorer file manager mobile application is used in transferring downloaded music from your Audiomack streaming app to your phone SD card storage..
Can I download Audiomack songs to phone online?
Yes, but it can be a little tricky doing that. First of all, you’ll need to turn ON your mobile data to download the music online on your Audiomack, then follow the steps highlighted in this article to transfer the downloaded music files to your phone external storage.
You may want to read this post :
Conclusion
Moving downloaded music or audio files from Audiomack to your phone’s internal storage is a practical way to manage your music collection/folder and ensure offline access to your favorite tracks.
By following the step-by-step guide outlined above, you can easily accomplish this task and enjoy your music library without worrying about storage limitations or the need for an internet connection. Make the most of your music and have it readily available whenever you want it!
Thanks for reading this article. I believed you love what you just read. Please share to your friends and family on social media platforms and comments below any error or corrections. Furthermore, do follow us on our social media to get our latest update and scoops. Cheers!


